
After completing this lesson, you’ll be able to:
In this lesson, you will:
After completing this lesson, you’ll be able to:
In this lesson, you will:
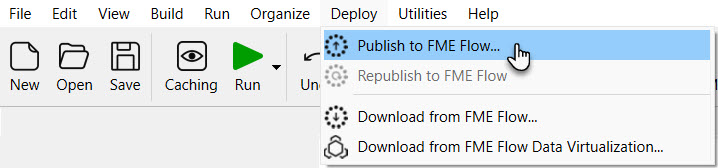
In FME Workbench, you complete the publishing process to transfer workspaces to FME Flow using the publishing wizard. Click Publish in the toolbar or from Deploy > Publish to FME Flow on the top menu to open the publishing wizard.
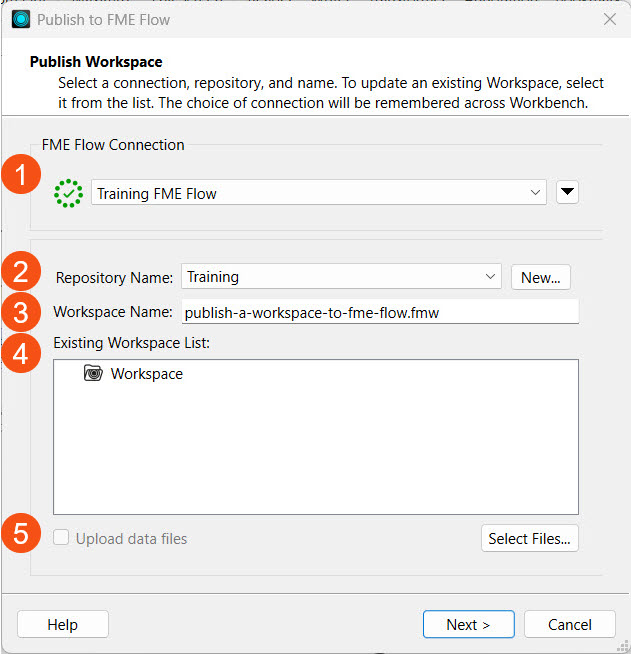
The first step of the publishing wizard appears. The settings are:
1. Select or create your FME Flow Connection. The options here are the same as those in the FME Flow Connection toolbar.
2. Select the repository to house your workspace. You may create a new one here, too. Repositories are like folders on FME Flow; they hold and organize workspaces and their related data. The Existing Workspace List will update with the workspaces already in your selected repository.
3. You have the option to change the workspace name. FME Flow will warn you if the workspace name already exists and ask whether you'd like to overwrite it.
4. The Existing Workspace List updates to show workspaces already in your chosen repository.
5. You also have the option to upload data files and select which files to upload. By default, FME uploads the data to the repository where the workspace resides. You will learn more about managing source data in Manage FME Flow Data and Connections.
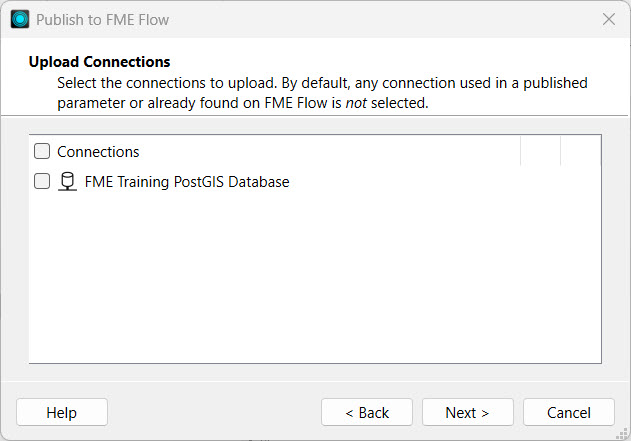
If your workspace uses a Web or Database Connection, the next step allows you to select which connections to publish to FME Flow. Generally, if your connection isn't already on FME Flow, you'll want to include it. You will learn more about managing connections on FME Flow in Manage FME Flow Data and Connections.
The last section prompts you to select the services to register the workspace.

The most common services are Data Download, Data Streaming, and Job Submitter, which are transformation services. Transformation services control how the workspace runs and how FME Flow writes or displays the output data.
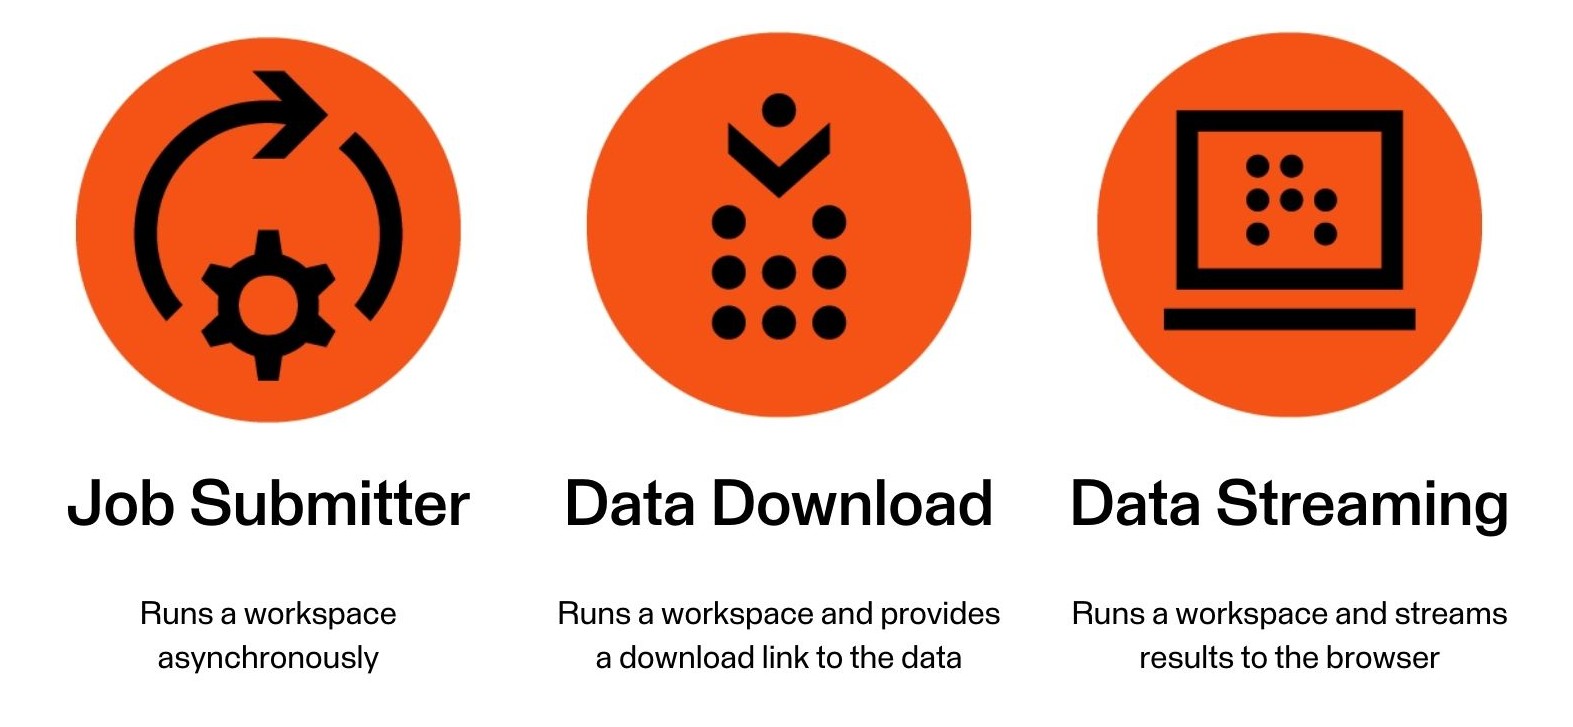
The Job Submitter service allows FME Flow to run a workspace as-is, which is the closest thing to running a workspace in FME Workbench. Data is written out as specified by the workspace's writers and is not streamed or delivered in any other manner. The Data Download and Data Streaming services will be covered in the last two lessons of this course.
You may register a workspace with multiple services, and you will select which service to use when running the workspace on FME Flow. While publishing a workspace with no services is possible, it cannot run on FME Flow without a transformation service, so you should always select at least one service. After publishing, you may also change the registered workspace services on FME Flow.
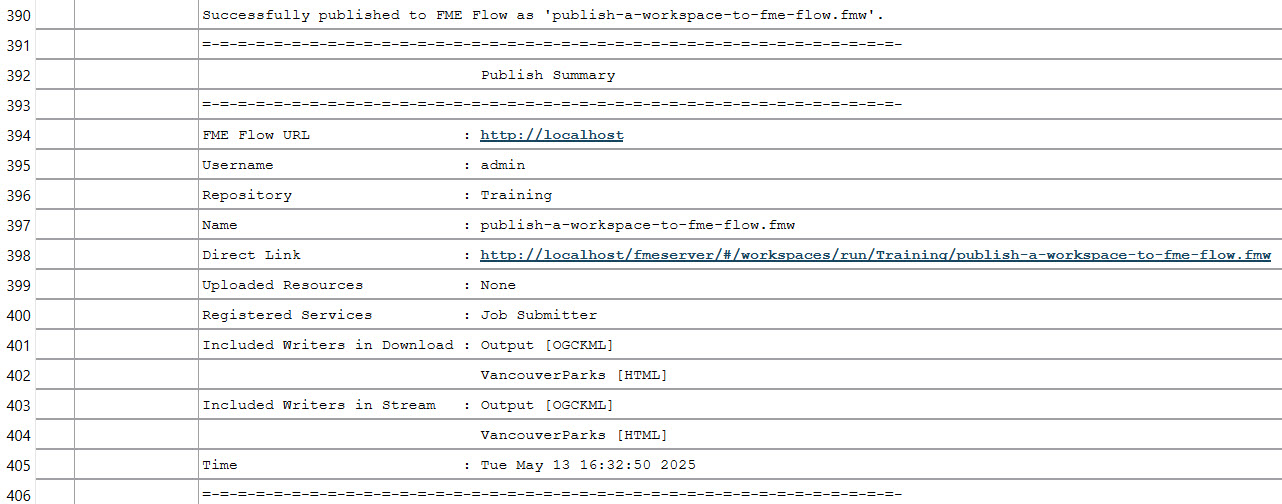
After you've configured all settings using the publishing wizard, clicking Publish transfers the workspace to FME Flow. The translation log in FME Workbench will indicate whether publishing was successful. The Publish Summary denotes information about the workspace you just published and includes a direct link to open the workspace on FME Flow.
The option to republish a workspace to FME Flow appears after you publish the workspace once.

You use republish when you've made minor modifications to the workspace, such as adding a new transformer or changing Reader settings. You may quickly publish those changes to FME Flow without modifying the original publishing settings using the Republish option. Republish uses the publish settings you previously used to publish the workspace to FME Flow without taking you through the publishing wizard. If you need to change any settings in the publishing wizard, such as changing the registered services, republish does not offer those options, and you must go through the entire publishing process.

Sven, a planning analyst and experienced FME Form user, is beginning to set up his workflows on FME Flow to maximize the FME Platform's capabilities.
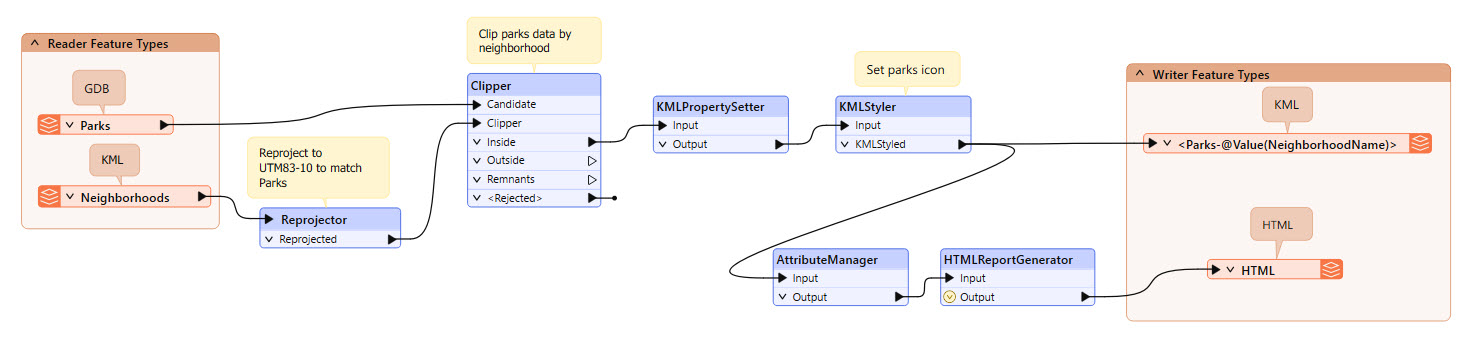
He wants to migrate a workspace that he frequently runs to FME Flow. The workspace reads Parks data from a geodatabase and Neighborhoods data as KML. The Parks are clipped to the neighborhoods, styled for KML, and written as a separate file for each neighborhood using a feature type fanout. Additionally, an HTML summary report is generated for the Parks data. Sven often shares this workspace with other FME users in his department, so having it on FME Flow will be handy, allowing multiple users to access it.
For this exercise, follow along with these steps and publish Sven's workspace from FME Workbench to FME Flow.
Open the starting workspace (C:\FMEData\Workspaces\DeployWorkflowsWithFMEFlow\publish-a-workspace-to-fme-flow.fmw) in FME Workbench (2026.1 or later).
Click the Run button to run the workspace and confirm it functions as expected.

You may receive an Unexpected Input dialog. You can ignore it and click OK; the translation will still complete successfully. For more information about this warning, see this blog post.
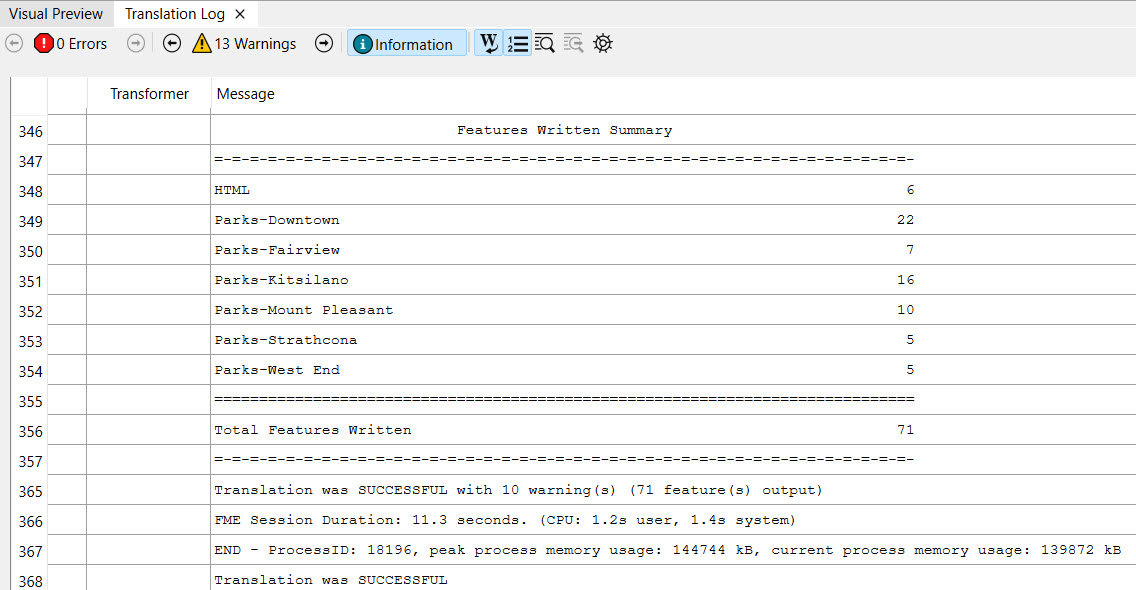
Check the translation log to confirm that the data was written and the translation is successful.
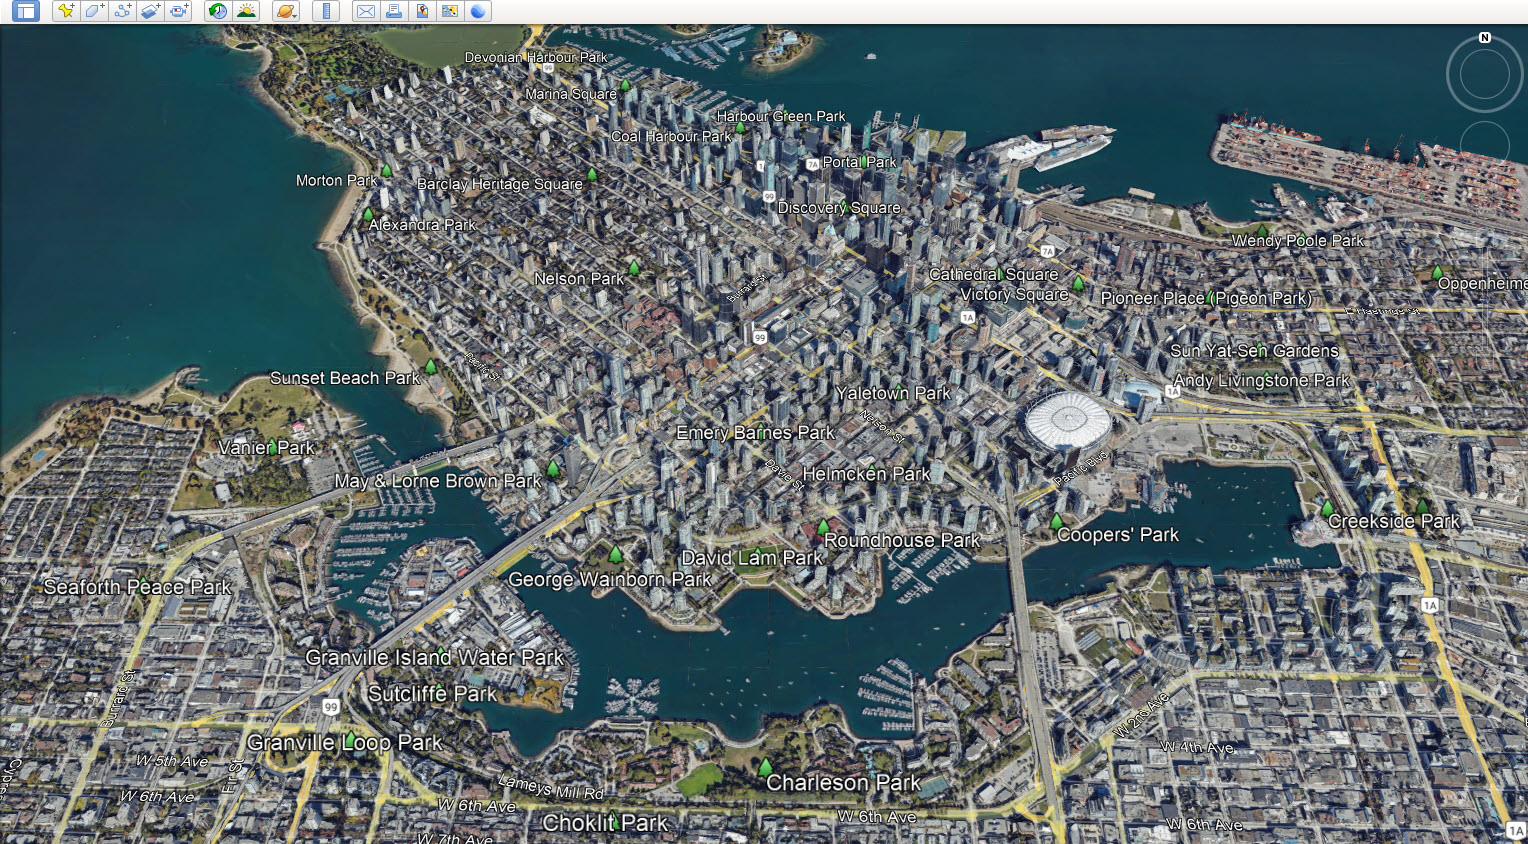
The output KML Parks data is written to C:\FMEData\Output. Open the KML files in Google Earth to inspect the output.
Return to FME Workbench. In the top toolbar, confirm that FME Flow is connected, then click Publish to begin publishing.

The publishing wizard's first part is selecting an FME Flow Connection. Ensure your current connection is connected and ready to use, denoted by the green checkmark.
For the Repository Name, open the drop-down and select the Training repository to house the workspace. If the Training repository does not exist yet, click New... to create it.
Leave the workspace name as the default. You can change the name if needed.

Click Next and register the workspace with the Job Submitter service for now. Later, you will update the workspace and publish it again with the Data Download and Data Streaming services.

Click Publish to complete the publishing process.
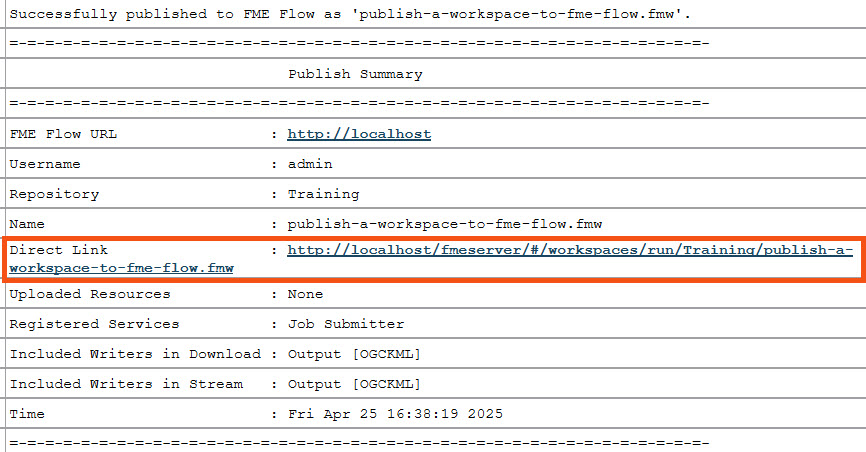
Check the translation log again for any errors when publishing the workspace to FME Flow. You should see that publishing was successful and review the Publish Summary information.
You have successfully published your first workspace to FME Flow. Sven and his colleagues can now access and run this workspace on FME Flow, which you will do in the next lesson.
In FME Workbench, you complete the publishing process to transfer workspaces to FME Flow using the publishing wizard. Click Publish in the toolbar or from Deploy > Publish to FME Flow on the top menu to open the publishing wizard.
The first step of the publishing wizard appears. The settings are:
1. Select or create your FME Flow Connection. The options here are the same as those in the FME Flow Connection toolbar.
2. Select the repository to house your workspace. You may create a new one here, too. Repositories are like folders on FME Flow; they hold and organize workspaces and their related data. The Existing Workspace List will update with the workspaces already in your selected repository.
3. You have the option to change the workspace name. FME Flow will warn you if the workspace name already exists and ask whether you'd like to overwrite it.
4. The Existing Workspace List updates to show workspaces already in your chosen repository.
5. You also have the option to upload data files and select which files to upload. By default, FME uploads the data to the repository where the workspace resides. You will learn more about managing source data in Manage FME Flow Data and Connections.
If your workspace uses a Web or Database Connection, the next step allows you to select which connections to publish to FME Flow. Generally, if your connection isn't already on FME Flow, you'll want to include it. You will learn more about managing connections on FME Flow in Manage FME Flow Data and Connections.
The last section prompts you to select the services to register the workspace.
The most common services are Data Download, Data Streaming, and Job Submitter, which are transformation services. Transformation services control how the workspace runs and how FME Flow writes or displays the output data.
The Job Submitter service allows FME Flow to run a workspace as-is, which is the closest thing to running a workspace in FME Workbench. Data is written out as specified by the workspace's writers and is not streamed or delivered in any other manner. The Data Download and Data Streaming services will be covered in the last two lessons of this course.
You may register a workspace with multiple services, and you will select which service to use when running the workspace on FME Flow. While publishing a workspace with no services is possible, it cannot run on FME Flow without a transformation service, so you should always select at least one service. After publishing, you may also change the registered workspace services on FME Flow.
After you've configured all settings using the publishing wizard, clicking Publish transfers the workspace to FME Flow. The translation log in FME Workbench will indicate whether publishing was successful. The Publish Summary denotes information about the workspace you just published and includes a direct link to open the workspace on FME Flow.
The option to republish a workspace to FME Flow appears after you publish the workspace once.
You use republish when you've made minor modifications to the workspace, such as adding a new transformer or changing Reader settings. You may quickly publish those changes to FME Flow without modifying the original publishing settings using the Republish option. Republish uses the publish settings you previously used to publish the workspace to FME Flow without taking you through the publishing wizard. If you need to change any settings in the publishing wizard, such as changing the registered services, republish does not offer those options, and you must go through the entire publishing process.
Sven, a planning analyst and experienced FME Form user, is beginning to set up his workflows on FME Flow to maximize the FME Platform's capabilities.
He wants to migrate a workspace that he frequently runs to FME Flow. The workspace reads Parks data from a geodatabase and Neighborhoods data as KML. The Parks are clipped to the neighborhoods, styled for KML, and written as a separate file for each neighborhood using a feature type fanout. Additionally, an HTML summary report is generated for the Parks data. Sven often shares this workspace with other FME users in his department, so having it on FME Flow will be handy, allowing multiple users to access it.
For this exercise, follow along with these steps and publish Sven's workspace from FME Workbench to FME Flow.
Open the starting workspace (C:\FMEData\Workspaces\DeployWorkflowsWithFMEFlow\publish-a-workspace-to-fme-flow.fmw) in FME Workbench (2026.1 or later).
Click the Run button to run the workspace and confirm it functions as expected.
You may receive an Unexpected Input dialog. You can ignore it and click OK; the translation will still complete successfully. For more information about this warning, see this blog post.
Check the translation log to confirm that the data was written and the translation is successful.
The output KML Parks data is written to C:\FMEData\Output. Open the KML files in Google Earth to inspect the output.
Return to FME Workbench. In the top toolbar, confirm that FME Flow is connected, then click Publish to begin publishing.
The publishing wizard's first part is selecting an FME Flow Connection. Ensure your current connection is connected and ready to use, denoted by the green checkmark.
For the Repository Name, open the drop-down and select the Training repository to house the workspace. If the Training repository does not exist yet, click New... to create it.
Leave the workspace name as the default. You can change the name if needed.
Click Next and register the workspace with the Job Submitter service for now. Later, you will update the workspace and publish it again with the Data Download and Data Streaming services.
Click Publish to complete the publishing process.
Check the translation log again for any errors when publishing the workspace to FME Flow. You should see that publishing was successful and review the Publish Summary information.
You have successfully published your first workspace to FME Flow. Sven and his colleagues can now access and run this workspace on FME Flow, which you will do in the next lesson.
